Verify Contract
Verify your deployed contract using flattened source code, JSON input, Sourcify and more. Verifying your deployed contract ensures transparency and trust by making the source code publicly available and verifiable. Seitrace supports verification for both Solidity and Vyper contracts, with seven methods available through the Seitrace UI.
Benefits of Verification
- Transparency: Publicly available source code.
- Trust: Community can verify the contract’s functionality.
- Security: Greater confidence in the contract’s integrity.
API For EVM Contract verification
You can use these API URLs as a replacement for the blockscout verification
- Sei mainnet (pacific‑1): https://seitrace.com/pacific-1/api
- Sei testnet (atlantic‑2) : https://seitrace.com/atlantic-2/api
The API does not require an API key; however you need to provide a dummy API key such as “dummy”.
Running the verification for Foundry:
forge verify-contract --watch \
  --compiler-version "<SOLIDITY_VERSION>" \
  --evm-version "<EVM_VERSION>" \
  --verifier blockscout \
  --verifier-url <BLOCKSCOUT_API_URL> \
  --etherscan-api-key dummy \
  --chain-id <CHAIN_ID> \
  --force \
  <DEPLOYED_CONTRACT_ADDRESS> \
  <CONTRACT_NAME>
Example Usage:
forge verify-contract --watch \
  --compiler-version "0.8.28" \
  --evm-version "cancun" \
  --verifier blockscout \
  --verifier-url https://seitrace.com/atlantic-2/api \
  --etherscan-api-key dummy \
  --chain-id 1328 \
  --force \
  0x19B3B4A3E625C3BE7B740D225B282bdb766f16F1 \
  Counter.sol:Counter
Seitrace UI
Verification is available for both Solidity and Vyper contracts. Currently, there are 6 methods for verification using the Seitrace UI.
Access this function at: https://seitrace.com/contract-verification
- Go to the Verify contract page (Resources → Verify contract (EVM))
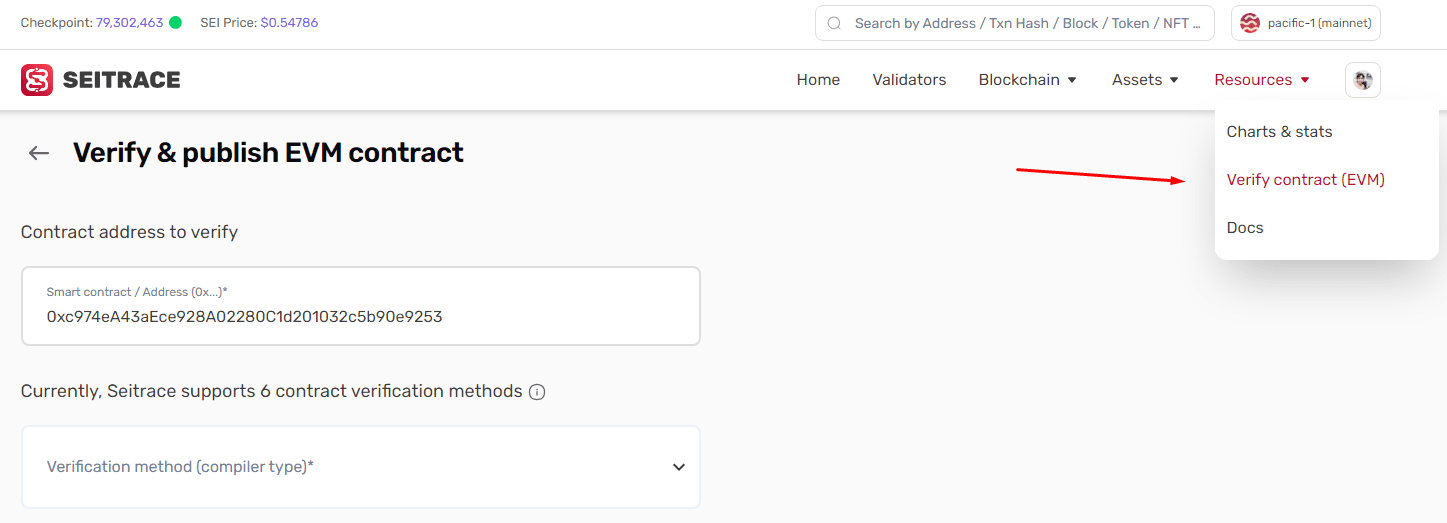
- Enter in the contract address you received during deployment. The dropdown will show you several available verification options. Select the one you would like to use and continue.
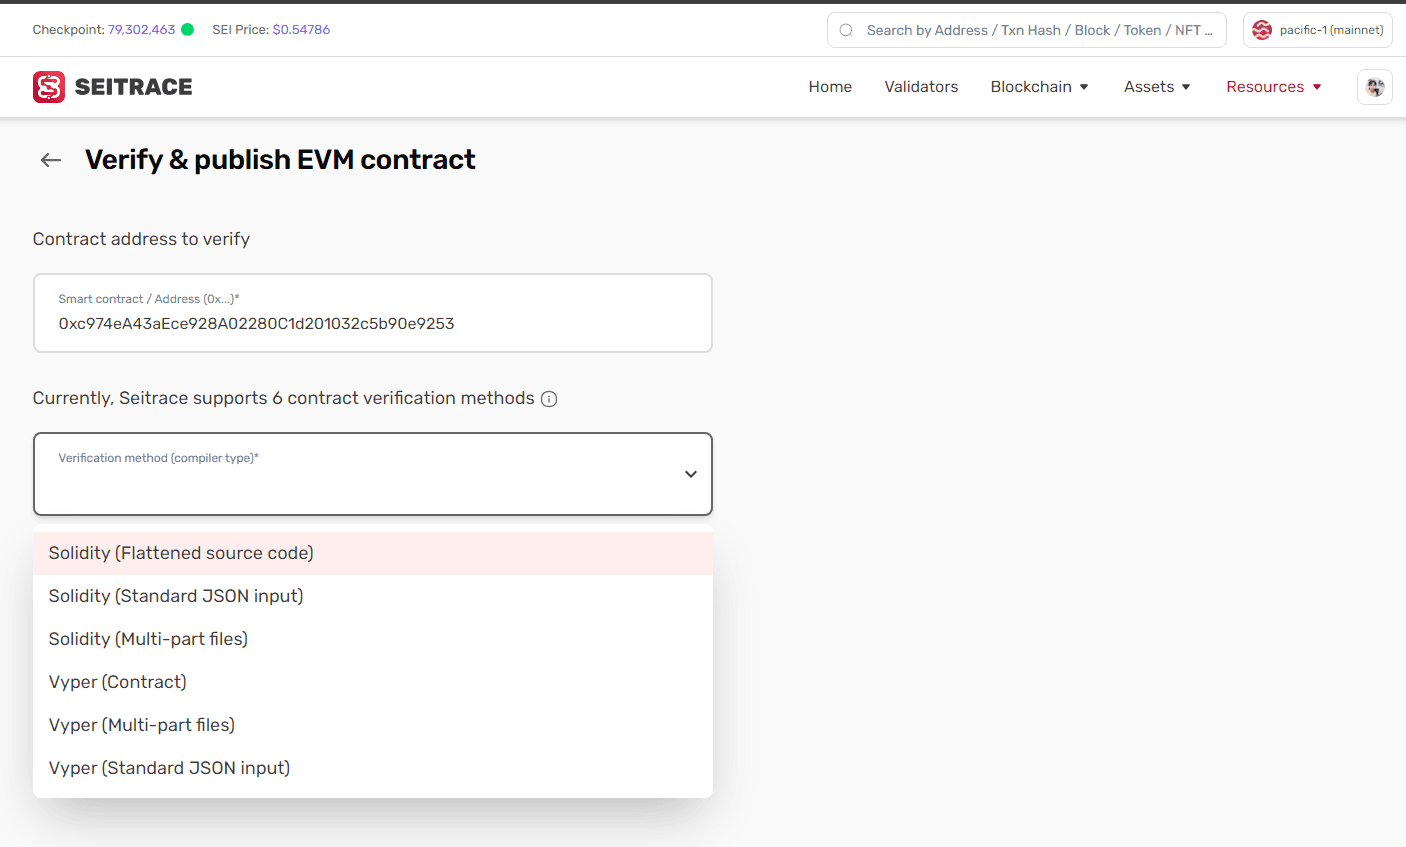
- Solidity (Flattened source code)
- Solidity (Standard JSON input)
- Solidity (Multi-part files)
- Vyper (Contract)
- Vyper (Multi-part files)
- Vyper (Standard JSON input)
Solidity (Flattened source code)
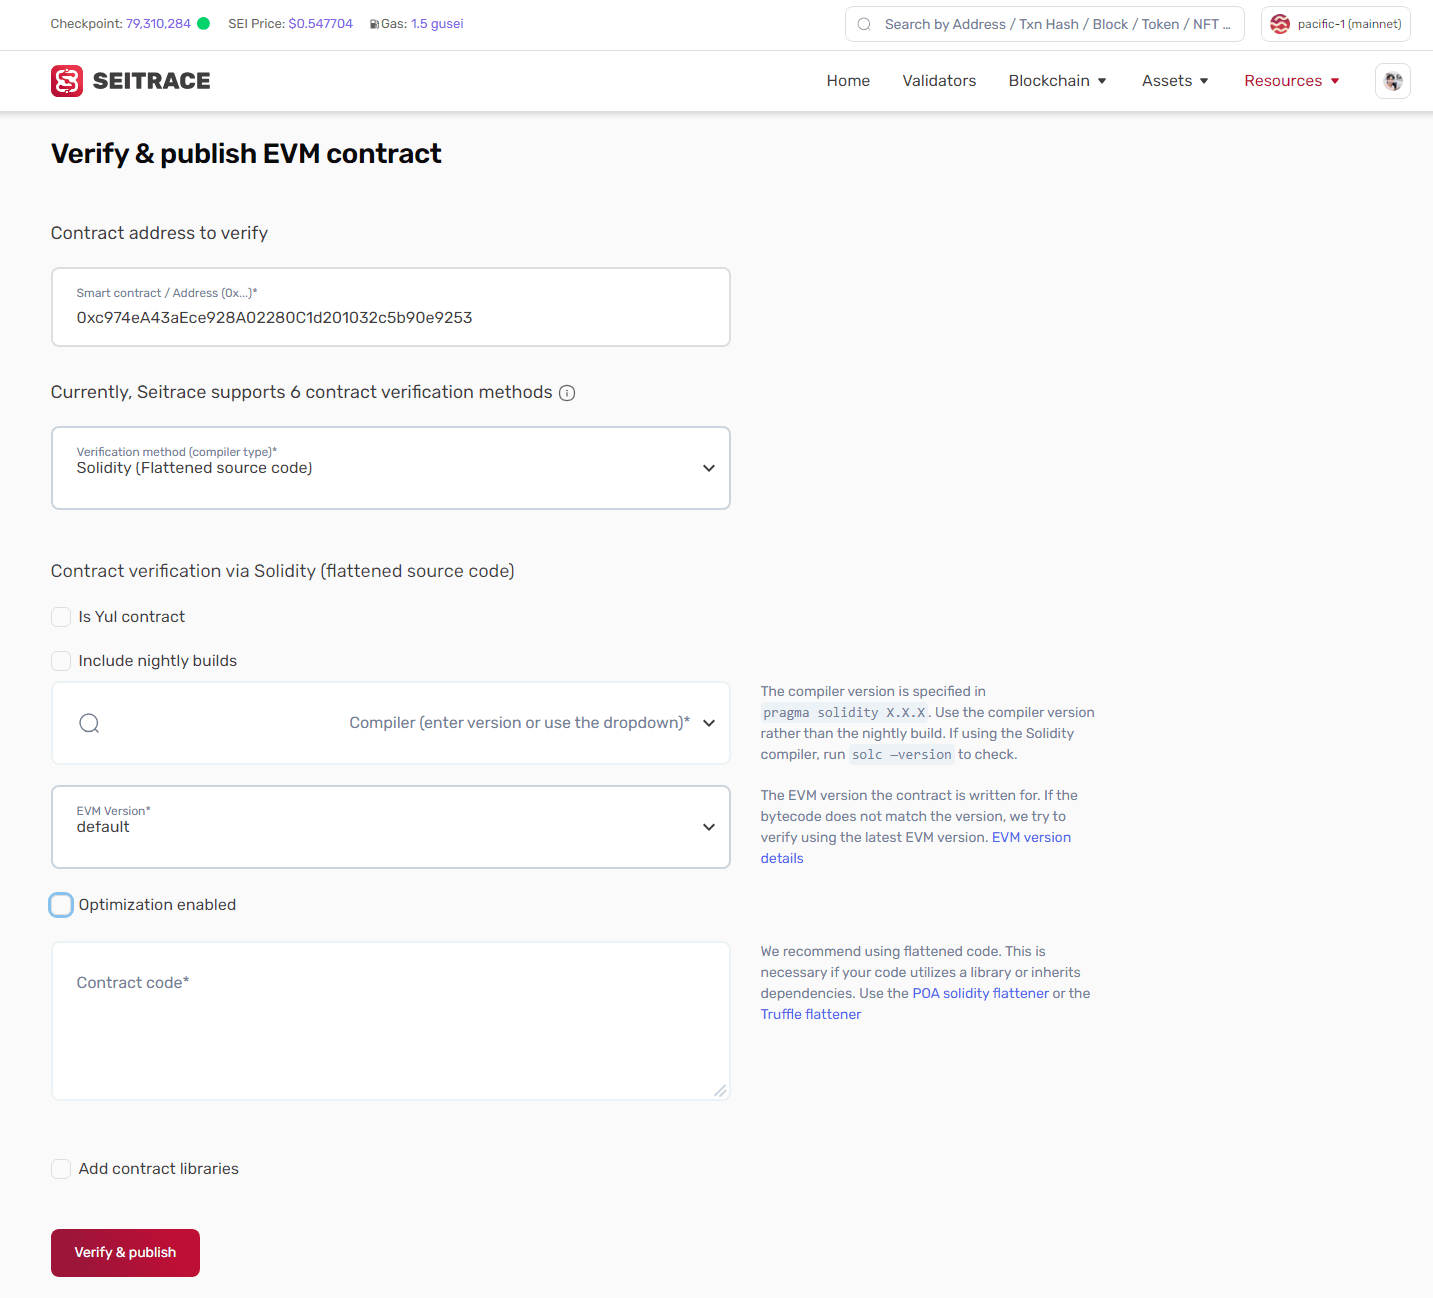
- Contract Address: The
0xaddress supplied on contract creation (added above). - Is Yul contract: Select if the contract is coded in Yul for efficiency.
- Include Nightly Builds: Select if you want to show nightly builds.
- Compiler: derived from the first line in the contract
pragma solidity X.X.X. Use the corresponding compiler version rather than the nightly build. - EVM Version : Select the correct EVM version if known, otherwise use default.
- Optimization Enabled: If you enabled optimization during compilation, select and enter the run value. 200 is the Solidity‑compiler default value. Only change if you changed this value while compiling.
- Enter the Solidity Contract Code: You may need to flatten your Solidity code if it utilizes a library or inherits dependencies from another contract. We recommend Hardhat or the POA Solidity Flattener .
- Add Contract Libraries: Enter the name and
0xaddress for any required libraries called in the.solfile. You can add multiple contracts with the “+” button. - Click the
Verify and Publishbutton. - If all goes well, you will see a check‑mark ✅ next to Code in the code tab, and an additional tab called Read Contract. The contract name will now appear in Seitrace with any transactions related to your contract.
Solidity (Standard JSON input)
More information on JSON input is available here.
- Include nightly builds: You can choose Yes or No depending on your compiler.
- Compiler: Choose the compiler version used to compile your smart contract. If you selected Yes for nightly builds, use the compiler version rather than the build.
- Standard Input JSON: Upload your Standard Input JSON file. File should follow the Solidity format and all the sources must be in Literal Content format, not a URL.
Click Verify & Publish and wait for the response.
Vyper Contract
- Contract Name: Name assigned to the contract.
- Compiler: Select the compiler version used in the source code.
- EVM Version : Select the correct EVM version if known, otherwise use default.
- Contract Code: Copy and paste the contract code.
- Click the
Verify and Publishbutton.
If all goes well, you will see a check‑mark ✅ next to Code in the code tab, and an additional tab called Read Contract.
The contract name will now appear in Seitrace with any transactions related to your contract.
Vyper Multi-part files and standard json input
See the information above.
Troubleshooting
If you receive the There was an error compiling your contract message this means the bytecode doesn’t match the supplied sourcecode.
Unfortunately, there are many reasons this may be the case. Here are a few things to try:
- Double check the compiler version is correct.
Check all version digits — for example0.5.1is different from0.5.10 - Check that an extra space has not been added to the end of the contract. When pasting in, an extra space may be added. Delete this and attempt to recompile.
- Copy, paste, and verify your source code in Remix . You may find some exceptions here.
Hardhat Verification Plugin
Hardhat is a full‑featured development environment for contract compilation, deployment and verification. The Hardhat Verification Plugin supports contract verification on Seitrace.
Get started
Install Hardhat
Via npm
npm install --save-dev hardhatVia yarn
yarn add --dev hardhat-
Create a project
Runnpx hardhatin your project folder and follow the instructions to create (more info here ). -
Install plugin
Install the hardhat-verify plugin - requires hardhat3
npm install -D @nomicfoundation/hardhat-verifyVia yarn
yarn add -D @nomicfoundation/hardhat-verify- Add plugin reference to config file:
Add the following statement to your hardhat.config.ts.
import { HardhatUserConfig} from 'hardhat/config';
import hardhatVerify from '@nomicfoundation/hardhat-verify';;
Config File
/** @format */
import { HardhatUserConfig } from 'hardhat/config';
import hardhatVerify from '@nomicfoundation/hardhat-verify';

const config: HardhatUserConfig = {
  networks: {
    sei_atlantic_2: {
      type: 'http',
      chainId: 1328,
      url: 'https://evm-rpc-testnet.sei-apis.com',
      accounts: [process.env.PRIVATE_KEY!] // if you need it
    }
  },

  solidity: {
    compilers: [
      {
        version: '0.8.28',
        settings: {
          optimizer: { enabled: true, runs: 200 }
        }
      }
    ]
  },

  plugins: [hardhatVerify],

  verify: {
    blockscout: {
      enabled: true
    }
  },

  chainDescriptors: {
    1328: {
      name: 'sei_atlantic_2',
      blockExplorers: {
        blockscout: {
          name: 'Seitrace',
          url: 'https://seitrace.com',
          apiUrl: 'https://seitrace.com/atlantic-2/api'
        }
      }
    }
  }
};

export default config;
Set up env. file
- PRIVATE_KEY: Wallet private key
PRIVATE_KEY="4c1a9ffd2dce9ed5b5f464c6b6a38efceb051855d123c9e6aeec751c35762d91"Deploy and Verify
- Deploy
npx hardhat ignition deploy ignition/modules/multicall.ts --network sei_atlantic_2- Verify
npx hardhat verify blockscout --network sei_atlantic_2 <contract_address> "Constructor argument"This is how your verification flow should look like:
PS D:\verify-contract> npx hardhat verify blockscout --network sei_atlantic_2 0xaa338AbfB92e7476596D4cCb98b29700BDcA2a6E "0xc99259dE8f9ec4cd443C0CF5D45D547c513E03be"
Successfully submitted source code for contract
contracts/VuNFT721.sol:VuSEI721 at 0xaa338AbfB92e7476596D4cCb98b29700BDcA2a6E
for verification on the block explorer. Waiting for verification result...

Successfully verified contract VuSEI721 on the block explorer.
https://seitrace.com/address/0xaa338AbfB92e7476596D4cCb98b29700BDcA2a6E#code
Confirm Verification on Seitrace
You can confirm the verified smart contract on Seitrace like this:
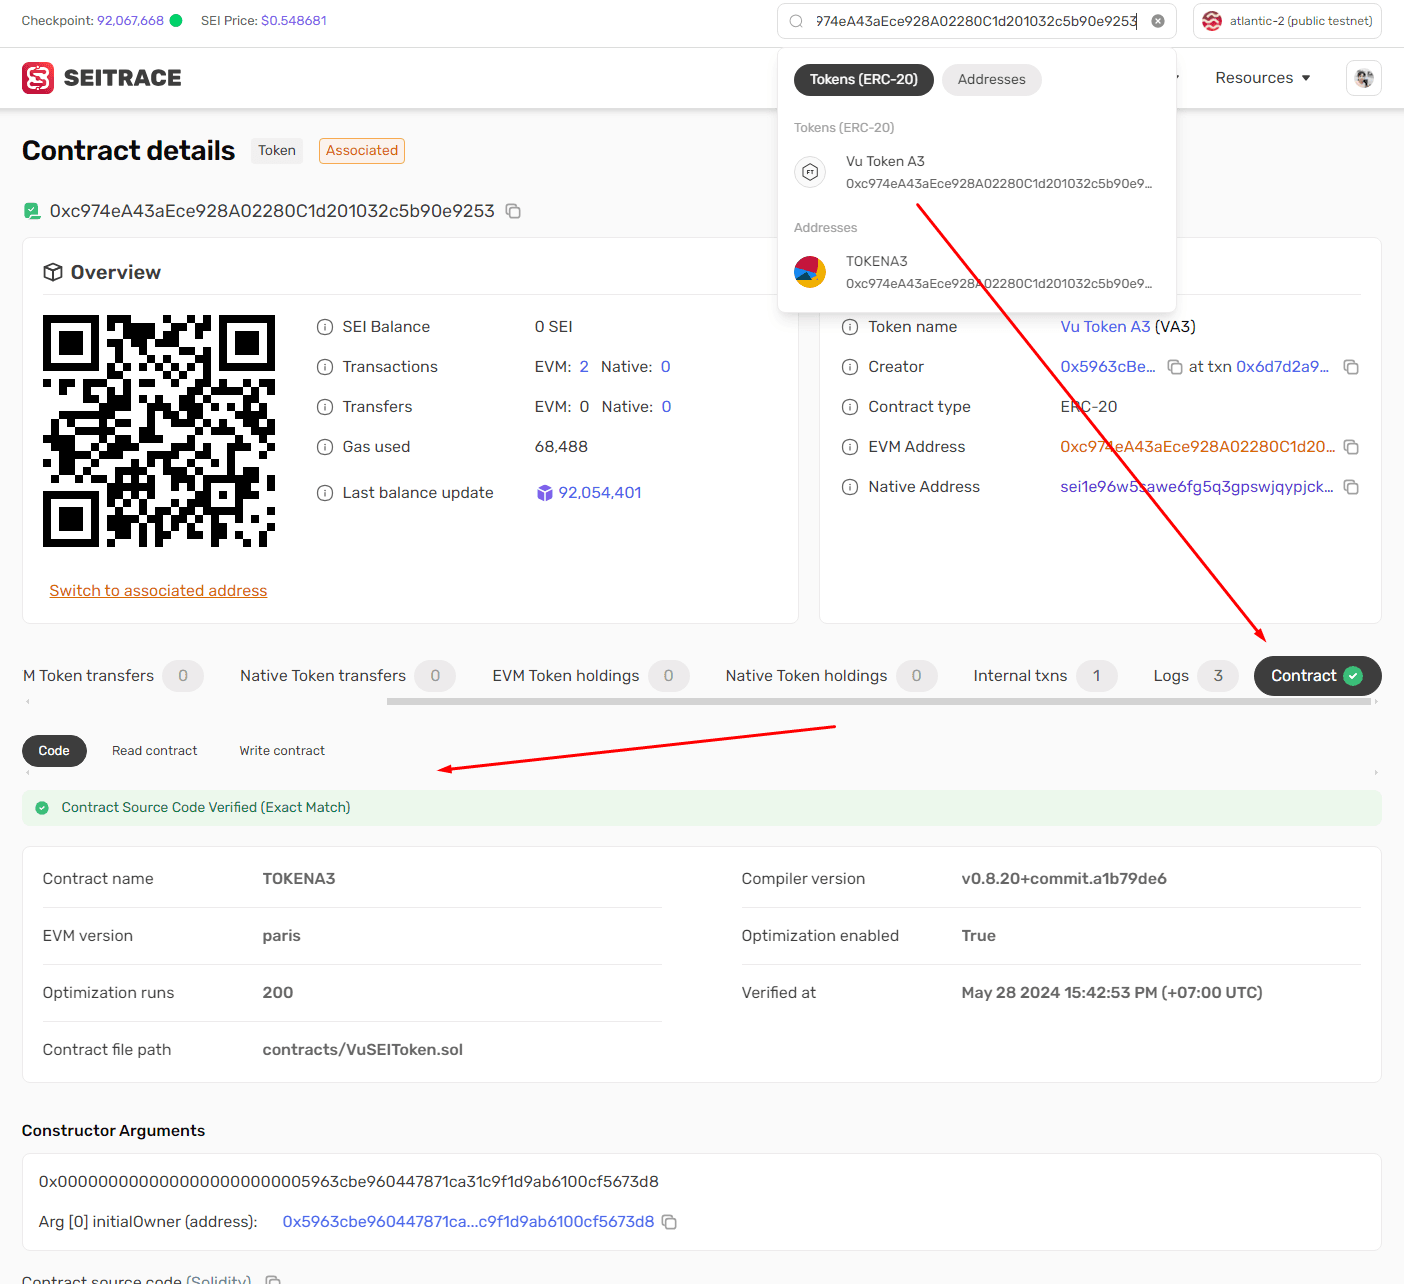
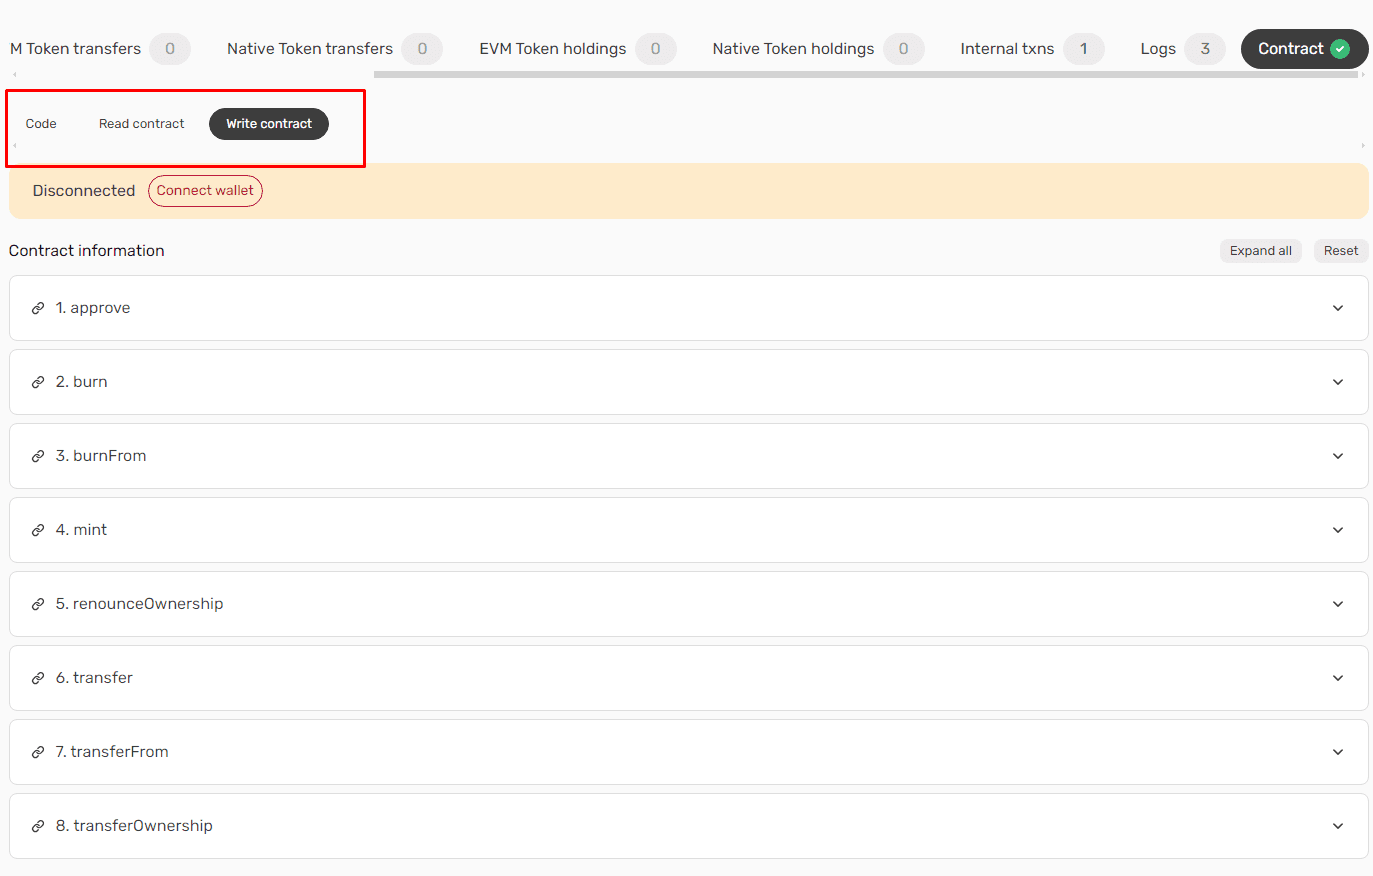
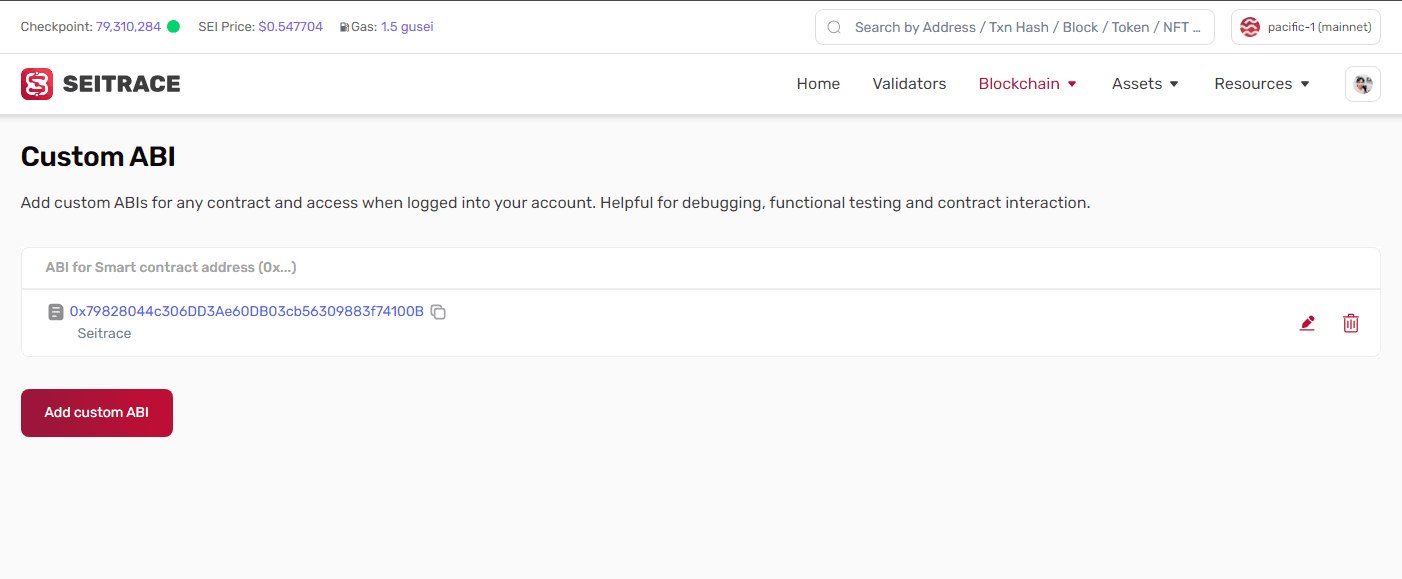
Custom ABI
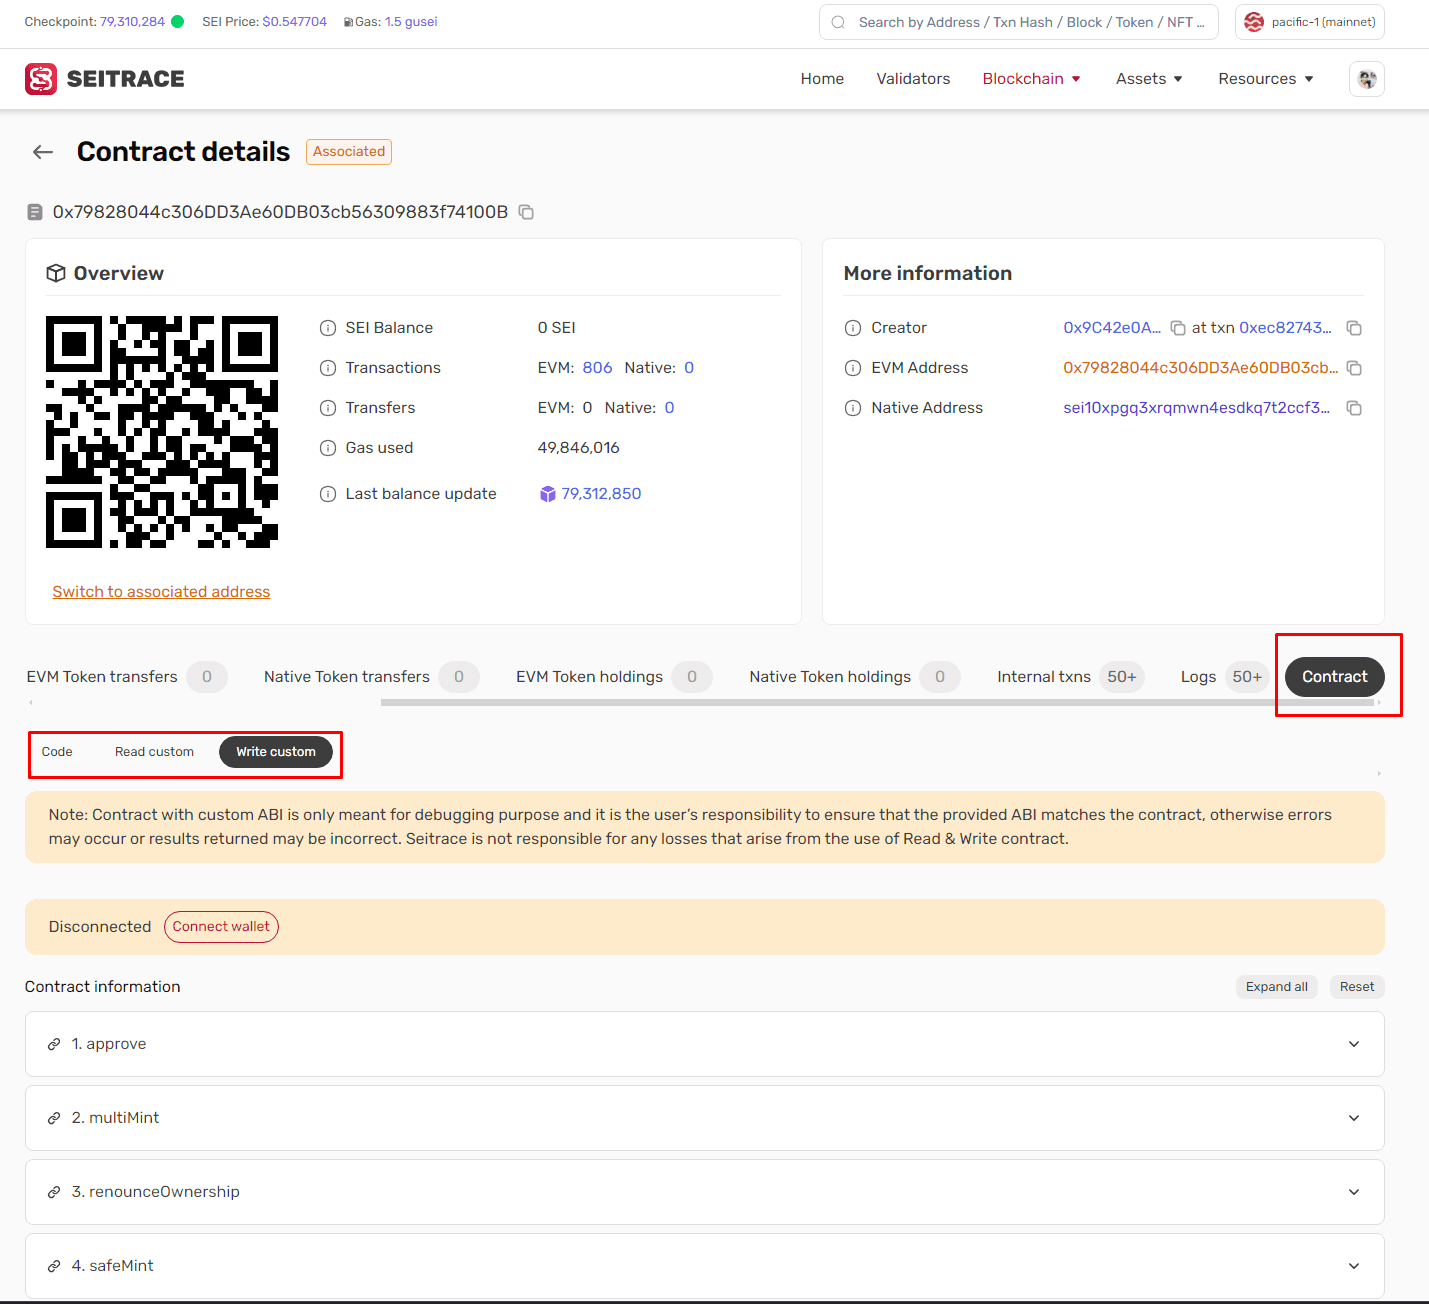
The Custom ABI feature is useful for debugging and testing newly deployed smart contracts. This feature can be used with verified or unverified contracts.
Once a custom ABI is added, the user can test methods using the Write Custom feature.
-
Login to My Account in Seitrace to get started. Once logged in:
a. Go to Custom ABI in the My Account menu.
b. Press the Add Custom ABI button
-
Fill in the fields.
a. Smart Contract Address: Enter the correct
0xaddress of the deployed contract.
b. Project Name: Create a name for your own reference.
c. Custom ABI: Copy and paste in the ABI for the contract from your development environment (truffle, hardhat, remix etc.) or, if the contract is verified, you can copy it from Seitrace.
d. Press Create custom ABI.
-
Custom ABI added to the home screen: You can edit or remove current custom ABIs or add additional custom ABIs from here.
